A whimsical place to play, where paper and ink become one.

Monday, June 18, 2018

Sink or Swim ~ A Masculine Card


 Welcome back friendsI am here with you today to share a masculine card with all of you. I struggle with Masculine cards so with Father's day just yesterday,  I thought I would share mine.

I am using the Polkadoodles "Sink or Swim" Stamp from LDRS Creative  in this card a long with our Splendid Azure 6"x6" Paper Stack. This paper pack is PERFECT for all your masculine cards!

For the sentiment I choose to frame it with the beautiful Dewdrop Circle Die Set. This set comes with a large and small medallion style dies. This is the smaller one which is the ideal size for your sentiments.  


One last close up look of my coloring. I used a lot of stippling to give the animals extra texture. This is one of my favorite coloring techniques.

I would absolutely love to see your LDRS Creative projects,  You can share it in the LDRS Creative FB Group, and tag me so I am sure to see it! :)

Happy Stamping!
Melanie

Tuesday, June 5, 2018

Club La La Land Crafts ~ Gnomes Gnomes and more Gnomes!!!!

Hi Friends,

Today I have some adorable projects to share with you. These have been designed for La-La Land Crafts as part of their monthly CLUB design team. I am in love with these adorable Gnomes. If your reading this and would like to begin receiving these exclusive kits in the mail each month click HERE to subscribe!!!

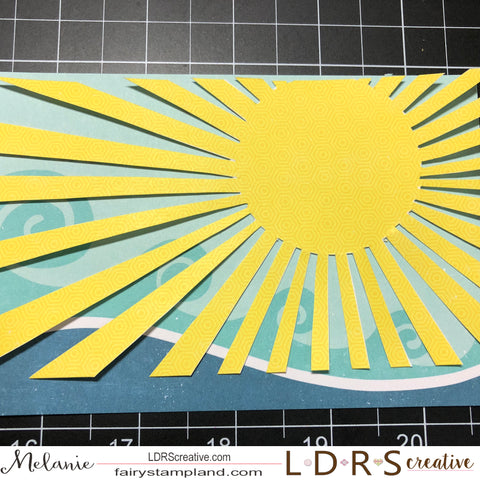
My favorite part of this card is the twig and berries die. I die cut it 3 times for each branch and I cut them apart and pieced them together.  I then created a berry arch with them. This little die has SO MANY possibilities. 

I have done a little masking with Gnome Marci as well.  I wanted her standing in front of the stack of logs. If you would like to see more on how to create something similar just drop me a message and I will do a tutorial sometime soon to show you this technique.


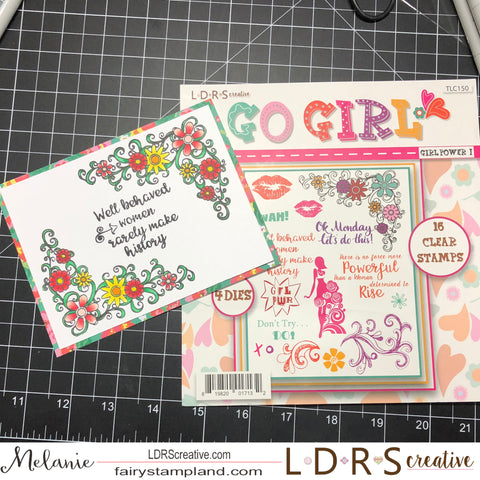
As you can see by the above picture our stamps are beautiful red rubber cling mount stamps. They stamp perfectly without any hassle. Everything here is from the kit except for the Wood Rings Stamp Set, which I have gotten from the LLLC Online Store.

I have colored both Marci and the logs stamp with Copic Markers in the following colors:

Copic Colors:
Skin E000,00,01,02,R20
Hair E30,31,35
Wood Rings: E13,15,17,18,19
Clothes R32,35,37,39, G24,28,29, B91,93,97

For my second card using this same exact kit are made from a couple of Gnome Marci's friends... you receive 2 full stamp sets each month as part of this club. See my YouTube video HERE

Are they not ADORABLE???? Again I have used the berry branch die cutting it just twice to change the color of the berries. I also cut apart the grass & mushroom border die cuts to create the center piece. 

The LLLC dies are by far some of these best I have ever used. I feel very spoiled when I am creating with them. Would you like to see our huge collection of dies? You can check out the  

I have used Copic Markers with this card as well ~

Skin: E000,00,01,02
Hair: C0,02,03
Clothing:  
 R32,35,37,39
B91,93,95,97
Y13,15,17

 With the club kit your receive a exciting package each and every month. It arrives in a shiny gold envelope and never disappoints! you can see my previous 2 card samples along with all the exact pieces in this kit by watching my 

 
These stamp & die kits are Exclusive and will not be available for at least 6 months-1 year after club members receive them. If you JOIN now you should be able to purchase past kits which is a perk of being a monthly subscriber. You also will receive a tutorial by each DT member each and every month. Check back on the 16th of each month to see the new kit!!!

Thank you for stopping by today. I have really enjoyed playing with these products this month, but just between you and me.... next months are AMAZING TOO!!! So stay tuned. If you want to be notified when I update my blog simply add your email to the side bar. I usually post about twice a week so not to worry I won't be stalking your email box.  

Happy Stamping my friends!
Melanie


Monday, June 4, 2018

Empowering women with Little Darling's Girl Power 1 Stamp & Die Set!

Welcome Back Friends!
I am here with you today to share a fun little card perfect for any strong women!
------------------------
This "Girl Power 1" stamp and die set is perfect for empowering women! I chose to use my Misti Stamping Platform to evenly line up my corner stamps. See photo below.
------------------------
------------------------
Here I have stamped the top left hand corner of my 4" x 5.25" white card stock. Then once I am happy with the stamping I simply rotated the paper to stamp other opposite corner. Super EASY!
------------------------
------------------------
To stamp the images I have used the Girl Power 1 Stamp and Die set, along with LDRS Creative New Hybrid Ink in Raven. This ink is amazing. You can use it for almost anything and it stamps so dark and crisp.
------------------------
------------------------
After stamping my corner images I colored in the floral and vines with my Alcohol markers. Above is a close up of some of my coloring.
------------------------
------------------------
The "Go Girl" stamp and die set is the set I used for the entire card. Look to see how nice the dies cut out the images...
------------------------
------------------------
Can't get that much more perfect than that can you? I love the quality of our dies!!!
------------------------
------------------------
One last look..... I hope I have gotten your juices flowing and your ready to create something empowering! If you would like to follow my work more closely feel free to leave your email address in the side bar to receive a couple emails per week when I upload new projects. Thank you for stopping by and Happy Stamping!

Melanie

Saturday, May 19, 2018

LDRS Creative Masking Technique ~ Puppy Time

Hello Friends,
Welcome back friends! Today I have a super easy project using the  LDRS Creative Stamping Mask Paper along with the Puppy Time Stamp Set.


As soon as I saw these adorable puppies I immediately thought of using them for a masking technique. This stamp set also INCLUDES the coordinating dies so you get more bang for your buck!

Here is my finished card. These puppies are so adorable. When you mask stamps like this the final result looks as if it was one stamp. It even tricked my husband. Let me show you how easy it really is to do.

Step 1: For this project I used a positioning tool for easier placement but because these are clear stamps it really isn't necessary. I have stamped the bottom dog onto my white card stock (on the right) and then I stamped it again on masking paper ( on left). Fussy cut the masking tape image.


Step 2: In this photo I am placing the "mask" that I fussy cut from the masking paper and I am sticking it down over the stamped image on the card stock.


Step 3: Stamp your second image right on top of the bottom image. When you peel away the masking tape you will see the magic begin to emerge.


Step 4: Next use the masking paper again to mask off the puppy's head so we can stamp the top puppy.


Step 5: Remove the masking paper.


Step 6: Now your little guys are ready to color :-)


Here is a close up of the coloring.  I have also used the Dewdrop Border Die
in the background.


I hope you have enjoyed today's post. To see more of my work feel free to visit my personal blog.

Wednesday, May 16, 2018

May 2018 Club La-La Land Crafts Release

Hi Everyone,

Super excited to be back today with a brand new Club La-La Land Release. On the 16th of each month I will be sharing with you that current months exclusive kit (for club members only)!! This month's kit has been extra special to me because I love gnomes and fairies. Marci Gnome is ADORABLE and so are her friends!


I am having so much fun designing with this kit. It is a "Gotta Have It" kit that is for sure. when you are a "Club Member" you get access to free tutorials from each of us who are a part of the Club La-La Land Crafts Design Team. These will be exclusive tutorials just for members. This first card is my months tutorial.


This is a center step card. This design has so many possibilities.  I had so much fun with all the dies from this months kit as well as the postage stamp set of dies which are from our La-La Land Crafts Online Store.


Here is the side view. This design really give dimension and it fits perfectly in a 6x6" envelope. 


Our dies have such detail I just love them!!!

For the next sample I saw the adorable little gnome carrying his light and I thought of a Gnome searching for home so I decided to create a night scene with the adorable mushroom house, his "Gnome Sweet Gnome"


I have used the Club stamps and dies along with the Stitched Nested Circle Dies and the Pierced Scallop Circle Dies as well which are both available in the La-La Land Crafts online store. 


With La-La Land Crafts,  Our Club materials are not available to the general public for at least 6-12 months from the club release date so rest assured you will be able to enjoy these stamps and dies right along with the design team.... wouldn't you like that? Don't forget you also will get FREE tutorials from each of the Design Team members each and every month that you continue on as a member. Check out the links below and I am looking forward to your projects with your Club La-La Land Crafts Kit!!!

Postage Stamp Dies


Thank you for stopping by. Please consider following me so you don't miss my future projects. 
Hugs, Melanie

Tuesday, May 8, 2018

Club La-La Land Crafts ~ April 2018 Exclusive Club Projects

<a href="http://www.lalalandcrafts.com/?AffId=19"><img border="0" src="http://www.lalalandcrafts.com/assets/images/affiliateBanners/affiliateBanner3.jpg"></a>


Hi Friends,

I am super excited to announce that I have been chosen to join the Club La-La Land Design Team so each month I will be sharing 2 posts showcasing 4 individual projects using the current month's subscription kit. On the 16th of each month we will have the new monthly kit premier. Unfortunately for April I was unable to participate in this due to my husband having unexpected surgery but click HERE to see all the amazing samples from my talented teammates.

http://www.lalalandcrafts.com/?affid=19 

This is April 16th, 2018th. Amazing kit. This was so much fun to design with. The dies are so detailed and are a dream to work with. Along with the above kit of supplies I also used the Nested Frames Large which can be found in the La-La Land Crafts Online Store.


Here is the first project I created. My husband and I just got back from our 25th Anniversary Cruise to the Western Caribbean. While in the Grand Caymen Islands we were able to hold Sea Turtles and all I could think of was this card I had just previously made before leaving town. This was the highlight of our trip and was an unforgettable moment.


 For my second project I made a sweet little Lei using the Hibiscus flower dies and colored up the adorable hippo stamps. Are they not precious??


For the hibiscus flowers I simply die cut the flowers and inked the edges and centers with a ink dauber then shaped them using a ball stylus and mat. I added Stickles to the tips of the flowers just to add some extra flare.

Make sure to check back on May 16th for the next Club La-La Land Crafts Reveal. To join ASAP simply click HERE.  

Hugs! Melanie

Thursday, May 3, 2018

LDRS Creative ~ Creating a Scene Mini Tutorial

Welcome back friends! I am here with you today to share a little Mini Winnie Magic.
____________
I am using this BRAND NEW Polkadoodles "Mini Winnie Boutique" Stamp & Die set. This "Mini" Winnie stamp set is perfect for your A2 size cards.
 
I have created a step by step photo tutorial to show you how I created this background scene simply using 3 different pieces of patterned paper.
____________
____________
 
I've chosen pieces of 6x6" paper from 3 different paper packs if you can believe that.... The sun, waves, and then boards. I just came home from a cruise and we did a lot of shopping by the water so I thought I would create a boardwalk/dock with shopping along the water.
____________
____________
Here I just cut between the rays so only the sun remained.
____________
____________
When layering these two layers, which have previously been cut down so they will fit onto an A2 size card (5.5 x4.25"). I then trimmed the rays to meet the waves as shown below.
____________
____________
Lastly glue the sun rays to the background waves/sky paper. and add this piece along with the boardwalk/dock across the bottom. I glued these all to an A2 card base.
____________
To give a separation between the water and the dock I decided to cut 2 strips of brown card stock 1/4" wide. I glued these on top of each other and then glued them over the seam. This just gives a little added dimension.
____________
____________
Once I completed my background I colored my two stamped images with alcohol markers and then die cut them using the coordinating dies which are included in the Mini Winnie Boutique Stamp & Die Set.
____________
____________
Using foam tape I added the Boutique and Mini Winnie to the scene and then simply stamped the sentiment which is also part of the set.
____________
____________
I hope I have inspired you today, and that you will have as much fun playing as I have. These complete sets make creating so easy and stress free. Make sure to check out all of the new items over in the LDRS Creative Online Store.
Happy Creating!
____________
Melanie