A whimsical place to play, where paper and ink become one.

Saturday, August 18, 2018

LDRS Creative ~ Inlaid Sunburst Rainbow Card

Hi Friends,
DT Melanie here with you today to share a fun inlaid card using our NEW Sunburst Rectangle Die Set.
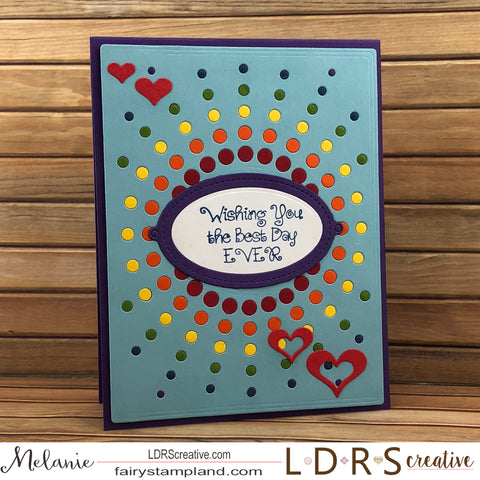
This was so much fun to create. Here is how I did it!

Step 1: Cut a piece of light blue card stock (4"x5.25") using the starburst die. Your base card will also need to be cut from a dark purple card stock (4.25x11") 

Step 2: Add double sided foam tape to the entire back of the light blue card stock. I did this for two reasons... 1.) I wanted the small pieces to attach without using glue. and 2.) I wanted to add a little extra thickness to the card since it was going to be quite flat.

Step 3. Start with the red card stock and simply die cut it using the same star burst die and take the largest "circles" and lay them into the holes of the die and simply press to adhere them. Do this with each color of paper, completing one color at a time before die cutting the next one.

Step 4: When cutting each starburst you will accumulate the circles from the center of the die. Glue these all together and glue to center of the card. This will give a little more stability when gluing the sentiment pieces onto the card.

Step 5: Using the Scalloped Rectangle Die Set, cut the tag die from both purple and white card stocks. 

Step 6: Stamp your sentiment using Hybrid Ink in Dark Washed Jeans. I have used a sentiment from the "Wishing You" sentiment stamp set.

Step 7: Glue sentiment over the center opening. 

Step 8: Die cut the small hearts from a red card stock and adhere.


I hope this little inlaid card has brightened your day. I hope you have the
"Best Day Ever" Hugs, Melanie

Wednesday, August 15, 2018

La-La Land Crafts August 2018 Club Kit Release

Hi Friends,

I have a super fun post for you all today. I have really been enjoying Club La-La Land Crafts. Working with their products is just seamless especially since their dies in the kit each month coordinate with the monthly theme. This months theme is camping, lets take a look...

For my first card today I have made a fancy fold card. If you are a La-La Land Craft Club subscriber you will automatically receive this as your FREE tutorial. That is a perk for being a member...you will receive tutorials from each of the Club DT members.


Here is a second look that shows you a better view of the fancy folds. I have colored three of the stamps from this months stamp sets. Of course "Happy Camper Marci" is the main character but I added the moose and bear from the Happy Trails stamp set along with the "Don't Feed The Bears" sentiment for some extra fun. The camper die was cut twice to give the doors and windows a contrasting color. Make sure to watch my YouTube video to see how special this camper die actually is.


The fire die was cut from white Copic Xpress It paper and hand colored using Copic Markers. I have used the following colors in this card:

Skin: E000, E00, E11, E21,
R20
Hair: E53, E55, E57, E59
Animals: E30, E31, E33, E34, E53, E55, E57, E59
Fire: YR12, YR14, YR14, YR27
Wood: E34, E37, E39, E59


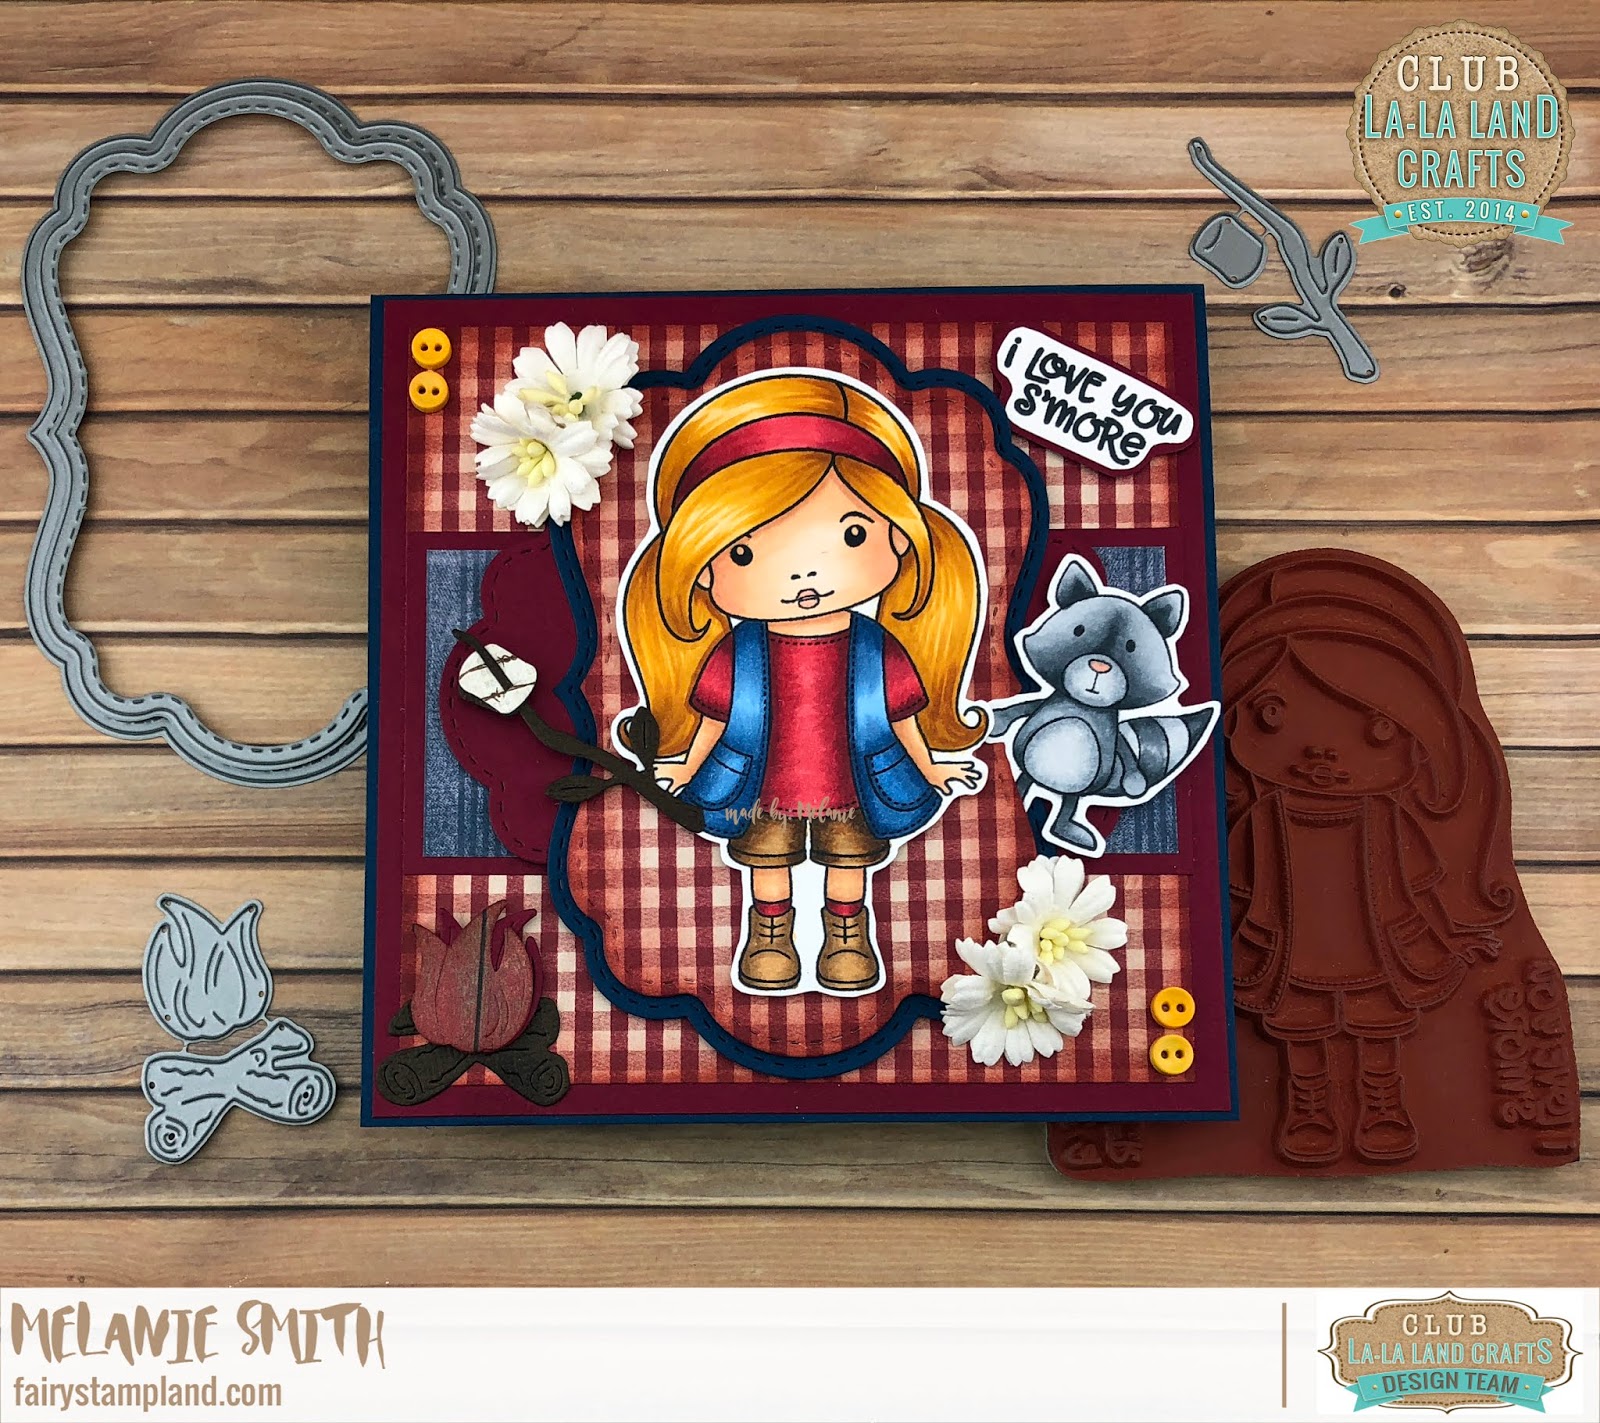
For my second card I started with the red and white gingham paper and used it to inspire my coloring. Each time I create a card using La-La Land Crafts products I think that most recent card is by far my favorite. This is one of those moments. I feel like I grow as an artist with each and every project and I thank La-La Land Crafts for supporting my creativity.


Here is a second look focusing on the layers of my card. I added the La-La Land Nested Frames in both the small and large to add depth and to really show off "Happy Camper Marci". 

The Nested dies are available in our online store. click below to check out all the details.


Speaking of Marci, here is a close up to highlight my coloring. I have used Copic markers in the following colors:


Skin: E000, E00, E11, E21, R20
Hair: YR20, YR21, YR24, YR27
Clothes: B23, B34, B37, R35, R37, R39, E53, E55, E57
Racoon: C0, C1, C3, C5, C7

One last look! Thank you for stopping by today. I hope I have encouraged you to pull out those craft supplies and take some crafty time for yourself. If I have inspired you today please click "follow" or add your email along the side bar to receive my posts directly. 

Have a creative day! 
Melanie


Tuesday, August 7, 2018

Magnolia-Licious Monthly Challenge ~ Doohickey Kit #10 ~ Still AVAILABLE!!!!!


Hello Lovely Friends,

Magnolia-Licious has just posted their August 2018 Monthly Challenge. Our challenge is "Anything Goes with an optional Fall theme" and I have a really fun project to share.


I was away at a 4 day crop when I shopped for these papers. I walked around the store with the "Tilda With Plant" Stamp looking for something gardening related. Then I spotted this Graphic 45 paper with the yellow Gingham design along with the vegetables. Oh My Goodness it was PERFECT! The colors were perfect for the FALL theme this month as well.


I colored Tilda to match the paper, which is how I like to create. When I was coloring her I had a friend ask about that. She seemed surprised that I choose my paper first so I thought I would mention it to all of you. To me this allows for me to coordinate the coloring for a more seamless design.

To frame Tilda I did use one of Magnolia-Licious Rox Dies. This set is the nesting squares and have a really pretty cross stitch pattern around the edges. Isn't it really nice? Very affordable too, ONLY $12.00! See all the available Rox Dies HERE in the store.


All of the other dies I have used are all from the Doohickey Kit #10 which is available in the store (In limited quantities) The Bumble Bee was cut from white card stock and then colored with Copics. The wings were cut from vellum and then Wink of Stella was added for a little shimmer. The bumble Bee trails were also from the kit. It just pierces the paper...So cute! These dies used here in the bottom left hand corner are also ALL from the Doohickey kit #10. The hive die in the background, the stitched hexagon, and the coordinating scalloped hexagon tag die. Make sure to check this kit out in the store.


See the source image

Would you like to be notified when I post a new project? Simply add your email to the side bar or click "Follow ME" Have an amazing day my friends and I will see you soon!!!! Melanie

Club La-La Land Crafts ~ Garden Marci & Fairies

Welcome back my friends,
Today I have my second monthly post for the July La-La Land Crafts Club kit. I have had so much fun with July's kit. I especially enjoyed coloring their clothing. There is still time to subscribe starting with August's Club Kit. Simply Click HERE! Have a question or curious about this club? All the details & perks are listed at the end of this blog post.


For my first card today I am using the Garden Fairies. For the background I wanted a sky so I got creative and using the "Nested Frames Large die" as a stencil I created the cloud background using daubers to dye ink with. I cut out the flowers and watering can dies with white Copic paper and hand colored them. I just love the detail of La-La Land Crafts dies. They are a joy to work with.


 My second card today is my favorite. This card features Garden Marci, she has a beautiful dress and I colored her dress using Copic markers and the zig zag folds technique. In the background you will spot the "Wood Rings Background Stamp Set inked up with multiple brown dye inks and I sponged the edges to give a halo look to the background. The extra flowers and the flower pot came from the "Just For You Background Stamp Set". Doesn't it go perfectly with Marci and her flowers she is holding??? They also coordinate well with the flower die from July's Club Kit. Notice how I cut apart the flower die to create corners for the top of my card. These dies are so versatile. Don't forget to also  check out all of the NEW Background Stamp Sets. I love that they have additional stamps to coordinate with the large background stamp.

Copic Colors:
Skin: E000,E00,E01,E02
 Hair: YR21, YR24, YR27
Clothing: B60, B63, B66, B69
Wings: Y04, Y08, Spectrum Noir Sparkle Pen Moonlight
 Flowers: YR 04, YR07,YR09 & YR20, YR21, YR23, Y24
Stems: YG91, YG93, YG95


Copic Colors:
Skin: E000,E00,E11,E21,R20
Hair: E23, E27, E29
Clothing & Flowers: 
B60, B63, B66, B69
YR 04, YR07,YR09. R17
YR20, YR21, YR23
Stems: YG91, YG93, YG95

If you are not already a CLUB member and wish to join simply CLICK HERE. The last day to order July's kit was July 17th but one of the many perks of being a member is being able to order previous kits, while supplies last.

CLUB DETAILS:

Our monthly club has 3 options. You can choose the stamp only package, the die only package or the full bundle. This months full kit has a value of $69.99 so being a subscriber has lots of savings along with the following PERKS!

Cost: Club Members save more than 40%
Stamps Only $19.99
Dies Only $29.99
 or full bundle for  $39.99 ($30 SAVINGS)

Also each month you will receive a "Surprise" in the mail all dressed up in a shiny gold envelope. Each full kit includes 2 Stamp Sets and multiple dies. Everything is coordinated by a different theme each month.

Exclusivity ~ These are only released to club members and will not be introduced to the regular customer line for at least 6-12 months.

FREE Tutorials ~ You will receive a link to the private tutorials created JUST for club members. Each Design team member makes one, so that is 10 FREE tutorials.

CLICK HERE TO JOIN
I cannot wait to see what you make :-)
Happy Creating!
Melanie


Saturday, August 4, 2018

LDRS Creative Lemonade ~ I Could Just Squeeze You!

Hi Friends,
Welcome back! I am here with you today to share a really bright and cheerful card.


This adorable stamp set is simply called "Lemonade" and is a fun little 4x4 stamp set. I have used a bunch of NEW dies from the LDRS Creative Online Store.


LDRS Creative supplies used:


As you can see from this close up photo, I have gotten a lot of dimension by adding lots of foam tape under some of the dies. The background was also stamped with the lemon stamp from the Lemonade stamp set. It almost gives it a designer paper look. 


One last look.... I hope I have brought a smile to your face today and that you make time for yourself this week and enjoy some crafty time! Hugs, Melanie

Thursday, July 19, 2018

LDRS Creative ~ A New Beginning


Today I am sharing a LDRS Creative project. This is the new stamp set called "A New Beginning" and these are such fun to color.


The Stamp set here "A New Beginning" is part of the most recent release along with this beautiful paper stack called "You are my Sunshine" isn't that the perfect name for this bright and cheerful 6x6" paper stack?

I have also used a couple different LDRS Creative dies. I had a lot of fun with the Super Sprigs set as you can see below.


Last but not least,  I also colored another stamp from this same stamp set and added it to the inside of the card.


I hope you have enjoyed my projects today, and that it has inspired you to get crafty!

Sunday, July 15, 2018

NEW RELEASE ~ La-La Land Crafts Monthly Club Kit

Hi Friends,

I have an exciting new La-La Land Crafts Club kit to share with you today. This is July's club kit and is ONLY available for 2 more days. If you would like to receive these in your mailbox details for signing up will be at the end of this post.


For this first card I have created an adorable flower box card featuring the EXCLUSIVE flower box die set. These two dies create a pocket style windowsill. You simply score along the flower box score lines and glue those flaps to your card, on top of the base, and it creates a pocket. I have chosen to add the flowers from this set into the pocket. Isn't it adorable???


I think I like this second card even more than the first one. If you are a Club Subscriber you will receive the design team's FREE tutorials. Each of us create a club ONLY tutorial each month and this double pocket card is my tutorial for this month. It was super fun to make and I am just loving the flowers used as a border inside the lower pocket. Then little flower fairy all tucked into the top pocket which will be a fun little surprise for the recipient.

CLUB DETAILS:

Our monthly club has 3 options. You can choose the stamp only package, the die only package or the full bundle. This months full kit has a value of $69.99 so being a subscriber has lots of savings along with the following PERKS!

Cost: Club Members save more than 40%
Stamps Only $19.99
Dies Only $29.99
 or full bundle for  $39.99 ($30 SAVINGS)

Also each month you will receive a "Surprise" in the mail all dressed up in a shiny gold envelope. Each full kit includes 2 Stamp Sets and multiple dies. Everything is coordinated by a different theme each month.

Exclusivity ~ These are only released to club members and will not be introduced to the regular customer line for at least 6-12 months.

FREE Tutorials ~ You will receive a link to the private tutorials created JUST for club members. Each Design team member makes one, so that is 10 FREE tutorials.

Happy Stampin'
Melanie