A whimsical place to play, where paper and ink become one.

Tuesday, September 30, 2025

Beyond the Holidays: Masculine Card with Pinkfresh Studios Holiday Express Collection


Hello Friends,

The brand-new Pinkfresh Studios Holiday Express Collection has just arrived, and I have gotten creative with it and changed it up a little. While this collection is perfect for festive, wintry scenes, today I’m excited to share how you can stretch it beyond the holidays. Instead of a seasonal card, I’ve created a versatile masculine card that works beautifully for birthdays, promotions, or even retirement.


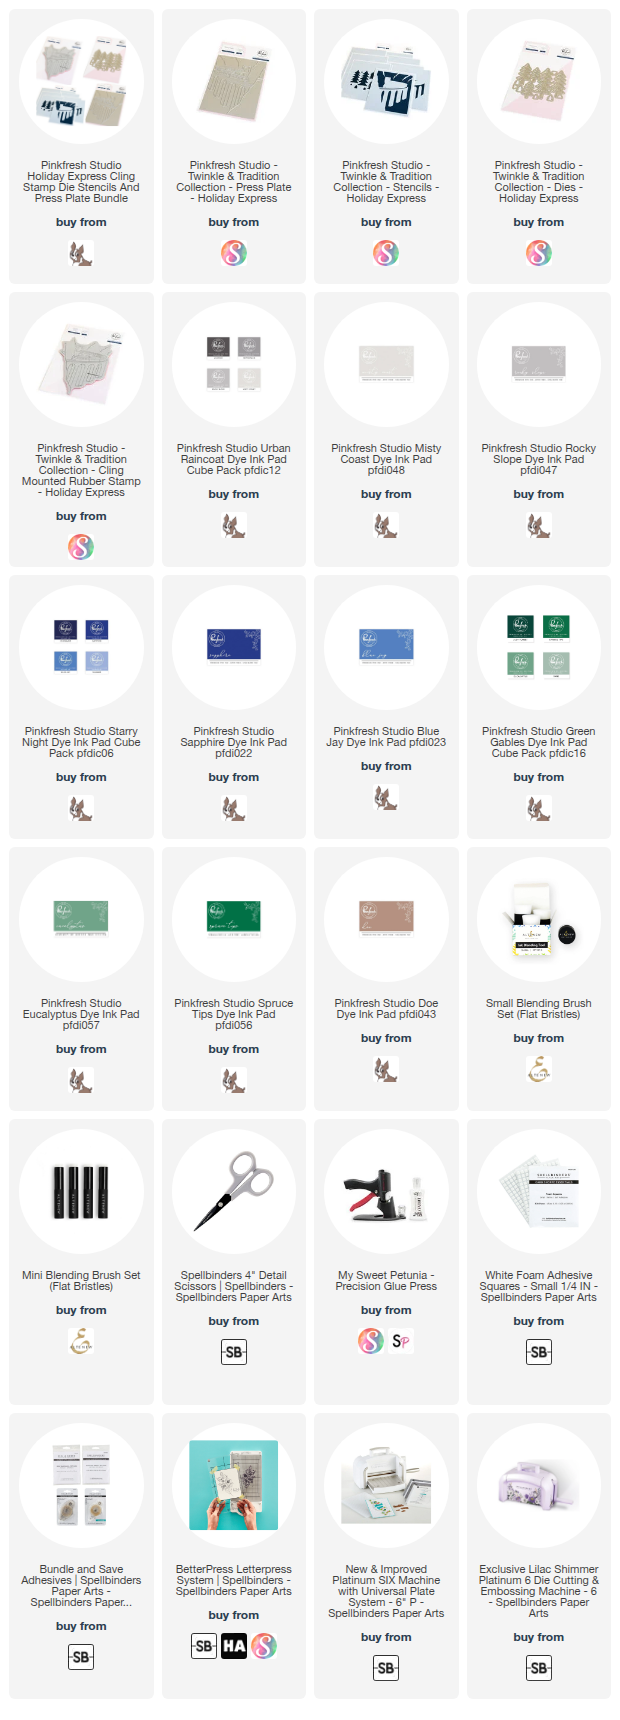
This collection includes:

  • Holiday Express Stamp Set

  • Holiday Express Press Plate

  • Holiday Express 8-Piece Stencil Set

  • Holiday Express Die Set

The main design features a charming express train crossing a tall bridge through rugged mountain terrain. The scene that feels both exciting and adventurous.

Step-by-Step Process

In today’s video tutorial, I walk you through the entire creative process:

  1. BetterPress / LetterPress Technique
    Using the Holiday Express Press Plate, we start by pressing the detailed train and mountain bridge scene for a crisp, letterpress effect.

  2. Building the Background
    With the first five stencils in the set of 8, I blend rich, natural gray tones to create a bold mountain backdrop. This step alone shows how versatile the stencil set can be when designing non-holiday landscapes.

  3. Layering the Trees
    The last three stencils bring the forest to life! I add depth and color to the trees, which coordinate perfectly with the all-in-one die set, making them pop right off the card.

  4. Adding the Sentiment
    To finish, I used the Pinkfresh Studios “Here for You” Press Plate Sentiment Set with coordinating dies. This gives the card a thoughtful message that’s perfect for a masculine all-occasion design.

Why This Card Works Beyond the Holidays

Even though the collection was designed with a holiday theme in mind, the mountains, forest, and train offer so many creative directions. By adjusting the colors and sentiment, you can create cards for men that feel adventurous, supportive, and celebratory—without a hint of seasonal flair.

Watch the Full Tutorial Below 👇


Full Supply List: 👇👇👇

Disclosure: Below are my personal affiliate links. When using these links and making any purchase from the website, the company may give me a small commission at absolutely no cost to you. Think of it like a tip. I send them traffic, and they give me a tip. When you personally use a creator's links, you are helping them continue to bring you free content. Thank you for your part of my vision in Crafting Life Together. I think inspiring others to craft alongside me is one of my biggest joys in life, and I truly appreciate it when you support my efforts. 🥰


Saturday, December 14, 2024

Highlights from 2024 - Altenew Educator Certification Program Class 1

Hello my lovely friends,

Today I begin a new journey which will help me grow as an artist into the New Year and beyond. I love Altenew products, and one of my highlights of 2024 was being invited onto the Guest Design Team for Altenew. So it only seemed like the right decision to make my next goal to become an Altenew Educator, as I love teaching so much.

Today I am sharing my first project from the Level 1 program "All about Layering 3 Class" I have designed a card featuring the Beautiful Day Layering Stamp and Die Set.  And I used the detailed tips from the class along with my Stamp Wheel to precisely line up the 4 layering images. One thing I learned from the class is that lining these multi layering images up do not always have to be spot on perfect. Having them off set a little actually is an entirely different artistic look, but I focused on lining them up as well as I could because that was the main focus of the class.


I participated in the Altenew Release this month and hopped along with all of my friends in the Video Hop. If you would like to check out everyone's videos, click HERE. I am featuring a few products here from the new release, including the gorgeous Essential Textures: Terrazzo Press/ Foil Plate. This background plate is stunning, both foiled and pressed. In this project, I have pressed it with the Mahogany Bark ink from the Martian Terrain Fresh Dye Ink Collection. Then I lightly inked around the edges using Pastel Sunrise Fresh Dye Ink and my blending brushes. 


This level one class taught me to not fear the layering stamps and to dive into color by using all 4 colors in a color family. I was enjoying the process so much, I decided to go with a monochromatic look for my design. For my extra layers here, I have stamped a single layer of the leaf stamps with the Mahogany Ink onto Chocolate Altenew card stock for a different look. I also embossed in a similar color onto vellum for the foliage stamp from the set to add some extra texture. Finally, the sentiment is also heat embossed.


I hope you have enjoyed my project. I look forward to bringing you many more in the new year. 

Crafty hugs, Melanie


Sunday, January 7, 2024

Let's Stitch! Spellbinders "Bee Stitched" Stitching Club January 2024

Hello Friends,

Today I have a fun video featuring the Bee Stitched Stitching club of the month from Spellbinders. This was so fun to stitch and create. In the video I walk you through some stitching as well as the card making. I hope this help inspire your creativity today. 


If you are interested in learning more about Spellbinder's Club offerings check out the WEBSITE HERE.

Friday, January 5, 2024

Fluttering Into Spring | DO NOT DO THIS W/ Your Spellbinders BetterPress

Hi Friends,

Today I am coming to you humbly with a BIG REVEAL. I was recording this video for the BetterPress Club Of the Month for Spellbinders below when I made a big mistake and realized I had cracked my BetterPress Platen. I did not want to hide this from you though because I knew it was so important to be transparent and share what I had learned. It is VERY important to me to be completely honest with all of you and knew this was so imoprtant to show and share.

I know Spellbinders has said it is very important to NOT USE Glimmer Plates inside the BetterPress because they can crack the platen. I did not realize that using a sticky mat like this would do this. In my prep for this video I had done it two or three times in the trial runs of using the sticky mat without any issues so I wanted to share my findings with all of you. Luckily this happened on screen and this happened and I am able to educate all of you which I strive to do on a daily basis in my work as a influencer in educating all of you in my YouTube videos. So here I am sharing this with you. 

I decided in the video right after this video that we would go ahead and press a second piece of BetterPress paper and we would do today's technique on this second piece and do a comparison and you know what?? I think the second one turned out better. 😃 You will actually have to watch the video to see it because the card I completed is actually the one I pressed before doing the video. Now lets take a look at the finished card....


Here are some of my bonus cards from the video also...


Thank you for stopping by today my friends. If you would like to check out the Spellbinders Clubs, Just CLICK HERE!

🐝 Buzzzz 🐝 | Honey Bee Jar | Spellbinders Large Die Of the Month Club |...

Oh Honey Come Check This Out!!!!

Is this not one of the cutest sets you have ever seen? I am speaking of Spellbinders Large Die Of The Month Club for January 2024. This set is so creatively designed and so fun to create with. Lets take a look...


 On my card I have create a fantasy style scene. I am envisioning a picnic table with a beautiful lace trim gingham table cloth covering it. The bees have already spotted the jar of honey sitting on top.... 🐝 Buzz Buzz 🐝 Can't you just hear them hovering all around the jar?  

If you would be interested in seeing me create this project I have a full YouTube tutorial below. If your wanting to snatch a set for yourself before they are gone you can check out all the Spellbinders Club Offerings by visiting the WEBSITE HERE.

Thank you for stopping by today, Happy crafting! Melanie 


Thursday, January 4, 2024

Distress Watercolor Pencils | Spellbinders Clear Stamp & Die & Embossing...

Hello Crafty Friends,

Today I have a fun quick and easy project featuring the Clear Stamp and Die of the month being offered by Spellbinders Clubs! In this video we do a little quick and easy water coloring using Tim Holtz Distress Water Color Pencils and then we will have fun creating this adorable card together. 


Happy Crafting,

Melanie

Tuesday, January 2, 2024

Spellbinders 2024 Club Overview DETAILS | How It Works | What is Offered

HAPPY NEW YEAR!!!

Hi Friends,

I hope this first post of 2024 finds you excited by what this new year has to offer. This year I have no set New Years Resolutions. I just want to live life to the fullest. As I get older I am realizing that living with intent is more important than all the stresses life can bring you. So if your reading this and you find yourself struggling through the day remember that you are loved and that there is always something to be thankful for. 

To begin this year I have been invited by Spellbinders to begin offering content using the beautiful Spellbinders Club kits. I have been a long time subscriber of the SB Clubs and so I am happy to promote these well priced, well valued clubs each and every month. To begin this journey I thought I would begin the month with a informational video sharing an overview of the Clubs and some of the many perks of being a club member. My goal is for this video to answer a lot of the commonly asked questions and be something you can refer back to as needed throughout the year. 

As always if you have any questions I am always here to help with those. 

Happy Crafting! Melanie 

Sunday, December 17, 2023

Altenew Wild Daisies Press Plate w/ TECHNIQUE Video | @Altenew Dec. Inspiration Challenge

Hello Friends,

Today I am excited to share a post that includes a lot of fun inspiration, including a 2 for 1 tutorial!  I am playing with a bunch of NEW Altenew products today over in my craft room and am inviting you over to my YouTube channel for a dual tutorial video where we will be doing some BetterPress techniques along with water coloring to complete today's card. 

I am also excited to be entering this card into the Altenew Monthly Inspirational Challenge over on the Altenew blog.


The prompt of this month's challenge is to draw inspiration from ANY of the previous Inspiration Challenge photographs in this challenge, channeling the colors, themes, compositions, or anything else that inspires your creative creativity. Below are the challenge inspiration photos from January-November 2023 that I drew my inspiration from. 

The image I choose my direct inspiration from was by Mindy Eggen's Photo below....

And is here is my project being entered....


Now for the FUN PART...... the VIDEO...... Let's jump into the craft room and create together.....  If you are in need of a list of products used please see video description for direct links or SHOP Altenew by clicking HERE. Thank you my friends for following my work.


Saturday, December 9, 2023

Altenew BLACK FRIDAY & CYBER Monday 2023 MEGA Haul @Altenew

Hi Friends,

I am sorry I have not posted in a while. I have been starting to change over my blog to coordinate with my YouTube channel as my focus has changed to YouTube i 2023 and will be continuing that direction in 2024. I have been eagerly growing my YouTube channel to try and reach my end of the year goals and I have surpassed my goal which I am really proud of. So in 2024 I will begin trying to post my videos over here as well. If you haven't already I would love for you to pop on over and begin following me on YouTube, Thanks friends!


Today I have a Black Friday/Cyber Monday crafty haul video to share with all of you. I went a little over board with the sales but I couldn't help it. The prices were so wonderful. Did you know Altenew now carried BetterPress plates? I am so excited by this. Also if you haven't heardn't heard I now run two facebook groups. See links below...

Heartfelt Card Making With Spellbinders & More

BetterPress Babes

Now lets watch the Altenew Haul Video.... All Affiliate Links are below the video if you see anything you might be interested in.... I am affiliated with numerous companies and using those links will help me earn a small commission at absolutely no cost to you. Thank you for supporting my efforts!


 BetterPress Items: https://shrsl.com/4c8tj

STAMP & DIE FOR BP Sentiments: https://shrsl.com/4c8u9 

Artists Watercolor Pan 24: https://shrsl.com/4c8tn 

Watercolor Metallic Pan 14: https://shrsl.com/4c8tp 

Watercolor Papers: https://shrsl.com/4c8tt 

Paint Brushes: https://shrsl.com/4c8tq 

Elegant Sayings: https://shrsl.com/4c8ud 

Versatile Greetings: https://shrsl.com/4c8ue 

Crafty Life: https://shrsl.com/4c8uf 

Create-A-Flower Tulip: https://shrsl.com/4c8ug 

Create A Flower Stargazer Lily: https://shrsl.com/4c8uj 

Build a Garden Grand Carnation: https://shrsl.com/4c8um 

Golden Days: https://shrsl.com/4c8uq 

Garden Trellis Cover Plate: https://shrsl.com/4c8uu 

Mix and Match Frames: https://shrsl.com/4c8uw 

Featured Sentiment Dies: https://shrsl.com/4c8ux 

Mandala Stencil: https://shrsl.com/4c8vn 

Flower Bunch Stencil: https://shrsl.com/4c8vp 

Narrow Brick Stencil: https://shrsl.com/4c8vq 

Frame Mask Stencil: https://shrsl.com/4c8vu 

Ribbon Waves 3D Embossing Folder: https://shrsl.com/4c8vv 

Daisy Bed 3D Embossing Folder: https://shrsl.com/4c8vx 

Altenew Metallic Foil Papers: https://shrsl.com/4c8vz 

Altenew Adhesives: https://shrsl.com/4c8w0 Tools: https://shrsl.com/4c8w2

Thank you again for following my work and crafting life with me. Melanie

Tuesday, August 15, 2023

Dancin' Halloween Collection By Spellbinders

Hi Friends,
 
Today I have some fun interactive cards along with a quick and easy embossing technique. These cards will be perfect for those who LOVE HALLOWEEN. These Cute Day of the Dead characters are fun with their bright colors and I decided to have them celebrating rather than being scary. 
 
Here is a close up photo.... 

I had a lot of fun choosing the colors for these. inks to all my supply list can be found in the description of the YouTube video for your convenience. The video is below. Thanks so much for stopping by and for supporting my crafting adventure.

Melanie 

Hope you enjoy the video! https://youtu.be/JxPF_DOOZDA


Thursday, August 3, 2023

Create A Flower Tutorial | Spellbinders Poinsettia | Susan Tierney Cockb...

Hi Friends,

Today we will share with you Susan Tierney Cockburn's flower making dies for the first time.  I have designed a fall themed Poinsettia and in this video below I walk you through each step of the process. I hope you will take a moment to join me as we craft life together. Just click below.

Melanie

Sunday, July 30, 2023

Join My New Facebook Group ~ Heartfelt Card Making With Spellbinders and More

Hi Friends,

Today I am sharing a special video on a card I created for the Heartfelt Design Team about a 6 weeks ago. A special friend from the Official Heartfelt Creations Facebook Page, Mrs Marla Owens, Requested a start to finish style video of this card. If anyone knows me they know I love my Heartfelt Family so I added it to my video list and here it is. Marla, I hope you find this video handy and I hope you share your inspired version in the Official group as well as in our NEW GROUP

Heartfelt Card Making With Spellbinders and MORE. 

Anyone reading this who may be interested is welcome to join as we are encouraging the use of our  favorite Heartfelt products but for people like me who craft with other products as well, those brands are welcome too. The main focus is keeping friends together and CRAFTING LIFE TOGETHER! Hope you will come join us! Here is the link... Heartfelt Card Making With Spellbinders and MORE


Wednesday, July 26, 2023

A Sweet Farewell To Heartfelt Creations, as a Design Team Member, You Will Be Missed!

Hi Friends,

Today is the end of a season in my life, one which has helped me process the death of my mother. When I tried out for Heartfelt Creations Design Team, I was dealing with my moms Estate and hadn't quite processed what had happened over the past few years with her Alzheimer's diagnosis and later her death. When your dealing with a loved one in such a state, and caring for them daily, you do what you have to do to care for them and THAT is your number one priority especially when that person is your best friend. Thankfully I had the support of my husband and daughter who helped me through that period of my life. They will never fully realize how grateful I am for them.

So when I decided to try out for the next design team call, I devoted myself to that decision 100% as I do anything I put my mind to. I studied, I practiced, and I developed my skills for almost a year before leading up to the try tryouts. Then it happened, my 3rd time trying out for the team, and I earned my way onto the Heartfelt Creations Creative team. I know mama had something to do with that. She would of been so excited to follow the journey. So with each flower I felt like I was healing a little bit more and now as I say goodbye to the team as well as the company I can fully say I feel like a completely different person thanks to this amazing company. So thank you Heartfelt for having me as part of your family and for giving me this amazing opportunity to grow and thrive as a individual and as a designer in this business. This card is a THANK YOU to you to commemorate my time with all of you! I wish you the very best in this next season of your life. Much Love, Melanie

For anyone interested in following my card making journey I have started my own group on facebook titled "Heartfelt Card Making with Spellbinders & More" All of you are welcome to join! Thank you friends for your ongoing support for my love of papercrafting.

 Directions:

Cut a piece of white card stock measuring 11 x 7 1/2” and score at 5 1/2” for a top folding landscape card base. Cut a piece of purple card stock to 5 1/2 x 71/2 ” and ink the edges using the HCDA1-449 Stack and Store Daubers along with Deep Purple Archival Ink. Adhere to the front of the card base. Now Cut a piece of Luxe Silver Card Stock to 5 1/4 x 7 1/4” and attach; followed by a piece from Sheet 6A from the HCDP1-2138 Decorative Dragonfly Paper Collection. Before attaching the Dragonfly paper, ink the edges with Night Sky Archival Ink. Next using the HCD2-7424 Rectangle Filigree Frame Dies Using the largest die cut it 3x, first from white card stock, second from Luxe Silver Card Stock, and lastly from Sheet 5A. (From sheet 5A only the inner die cut piece will be used) With the second smallest frame set cut 2x from both white and silver, and from the inside frame outline die cut from sheet 3A. Ink edges of the Dragonfly papers with link colors. (Deep Purple, Night Sky, Leaf Green) Layer as shown in the photos making sure to offset the silver layers behind the white layers and using foam tape behind the inside frame. For the sentiment layer use the HCD2-7351 Iron Work Sentiment Dies and cut 3x, Once from Luxe Silver, once from white card stock, and once from sheet 5A. Ink the 5A layer a little with Deep Purple ink to darken it a little. Layer the sentiments so that the purple and white layers are exactly on top of each other and the silver is slightly on top. (Designers Note: The dates added below the Thank You sentiment are the years the designer has actually been on the Heartfelt Creations Design Team, and this card is to commemorate that. “Thank You Heartfelt for a beautiful journey”)

Stamp out 8 medium and 2 large Climbing Clematis Flowers onto HCPP1-475 Deluxe Flower Shaping Paper using the HCPC-3954 Climbing Clematis Cling Stamp Set using Distress Oxide Wilted Violet Ink. Color using a blending brush and Majestic Violet Archival Ink. Die cut with coordinating dies and run through the coordinating 3D mold. Using the HCST1-401 Deluxe Flower Shaping Kit press the centers of the flowers and pierce the centers to add HCS1-459-4 Rock Candy Stamen. Secure with a glue gun. Now stamp the HCPC-3816 Lush Lilacs Cling Stamp Set 1x onto Deluxe Flower Shaping Paper with Night Sky Archival Ink. Color using French Ultramarine Archival Ink and ice cut using the coordinating die. Ink the tips of the flowers with Night sky before running the flowers through the coordinating 3D flower mold. Now using the Flower Shaping Kit press the centers with the smaller ball tools. Using a small golf tool pierce a tiny hole into the center of each flower and thread thru 1/2 of a pastel pearl stamen small and secure to the back with a drop of glue.  To finish the flowers simply add Nida Tanner’s Magic Glitter Powder by adhering it with Dries Clear Glue and a Hydra Sponge. Lastly for the leaves create these by stamping the HCPC-3835 Leafy Accents in Olive Archival Ink and coloring it in with Leaf Green. Die cut with the coordinating dies. Before running the leaves through the 3D mold ink the edges of the leaves with Olive ink. Once the leaves are shaped all there is left to do is to arrange the beautiful corner arrangements. Cut a piece of coordinating paper from the Decorative Dragonfly Collection to complete the inside of the card.

I hope you enjoyed that as much as I enjoyed creating it for each of you! Check out my personal project in the Heartfelt Creations Gallery to find out what products I used for this project.

Also, please be sure to visit the Heartfelt Creations Blog to see all of the gorgeous projects created by the other amazing design team members.
Sunday, July 23, 2023

Hot Foiling Heartfelt Creations Dies

 Hi Friends,

I was challenged by a post in the Official Heartfelt Creations group when someone asked the curious question; "Is it possible to hot foil Heartfelt Creations dies?" Well since it is my last month as a designer for the company I thought I would step up to the challenge and get my beautiful dies out and have a play with them along with My Spellbinders Glimmer Hot Foil Machine. Lets take a look, then make sure to follow the link over to the video below....


In the photo below you can see the outer decorative oval hot foiled in silver hot foil. The die cut lines foil onto the paper rather than cutting the paper. Also if you look closely there is a nice little detail around the Merry Christmas as well. I foiled them before actually creating the sentiment. 

In this photo below you can see the foiling around the words even better. When experimenting I was surprised that the foiling still showed.

Now that you have seen close ups head on over to My YouTube Channel to check it out. Also just so everyone knows I have started to NEW facebook group called "Heartfelt Card Making with Spellbinders and More" I would love it if you would all join. Looking forward to crafting life together! Melanie

Wednesday, July 19, 2023

Holiday Ornament Collection by Heartfelt Creations ~ Our Last Release

Hi Friends,

Thank you so much for all the warm comments and for those who reached out to me last week. Your words of encouragement and support for the new Heartfelt Card Making with Spellbinders and More facebook group has been overwhelming.  Make sure to keep spreading the word.

Today I am sharing my second card featuring the Holiday Ornament Collection. I went super basic here for a clean and classic mail-able card. I hope you enjoy it.

Directions: 

Cut a piece of white card stock measuring 7 x 10” and score at 5” for a side folding card base. Cut a piece a red mirror card stock to 5 x 7” and adhere to the front of the card base. Now from the HCDP1-2153 Holiday Ornament Paper Collection cut a piece measuring 4 7/8 x 6 7/8” from sheet 4B and before gluing it attach a piece of 1” red ribbon around it and secure it to the back. Now attach this plaid piece of paper to the card front. 

Next cut a piece of red mirror card stock to 4x6” and cut a piece of white card stock to 4 7/8 x 5 5/8” Using a stamp positioner, stamp the small ornaments from the HCPC-31031 Noel Holiday Ornaments Cling Stamp Set and HCPC-31030 Sparkling Holiday Ornaments Cling Stamp Set onto the white card stock in Sunflower, Emerald Green, Olive Green, and Red Geranium Archival Inks. Then run this paper through a 2D embossing folder for a fun textured look. Once embossed glue it to the red mirror card stock and attach the layers to the card base using 3D foam tape along the top half and bottom half of the card leaving room for the 1” ribbon to run along the center behind the panel.

Next stamp the “Merry Christmas” Sentiment from the HCPC-3995 Starry Holiday Greetings Cling Stamp Set onto Luxe Gold Card stock using Versamark Ink, and heat emboss using Gold Embossing Powder. Die cut it with the coordinating dies. Also cut 3x from white card stock.  Stack and glue together with the gold on top. This gives the card front dimension all while still keeping the card clean and simple and easy for mailing. Lastly add mini rhinestones to assorted ornaments to give the card a little extra shine. Finish the inside as desired.

I hope you enjoyed that as much as I enjoyed creating it for each of you! Check out my personal project in the Heartfelt Creations Gallery to find out what products I used for this project.

Also, please be sure to visit the Heartfelt Creations Blog to see all of the gorgeous projects created by the other amazing design team members.

Wednesday, July 12, 2023

Heartfelt Creations Last Release and My Honest Thoughts

Hi Fellow Crafters,

Well today is THE day for the final collection release with Heartfelt Creations. I know this is a sad day for everyone but we will we will always have our memories with this wonderful company.  I will be honest with all of you, I struggled designing with this collection so you will see my cards are a lot more basic than usual. When I received this collection 3 months back I had just been notified about the upcoming closure of the company and my little heart was broken. So designing on a deadline was difficult for me. This week and next weeks cards are rather basic and I hope everyone understands, and bares with me. 

After receiving the news I went through a world of emotions as if I was going through a type of real grief. I worried the most about all of the customers and how you all were going to deal with this news. I struggled with this for quite some time as I could not really talk to anyone about the situation. I knew how I was feeling being on the team and losing the team in yet some of you have been following the company for a lot longer than me. Well then I had to push those feelings aside so I could figure out how to cope and that is when I decided it was time to pick myself up and dust myself off and decide "What's Next for Melanie?" 

I have been a designer in this business for over a decade, and Heartfelt Creations was my dream position. So deciding what to do next was a BIG step for me. I had already begun considering making more YouTube videos but with the schedule of the full time Heartfelt position, there just wasn't a lot of free time due to  the extensive amount of time I put into each and every project, plus the team requirements as well. So I decided to begin reaching out to different companies, being PROACTIVE and POSITIVE. Seeing who might be interested in teaming up with me? Rather than waiting around to see what would happen next. A few companies made offers and Spellbinders seemed like a good fit. They had a wide variety of quality products, they have a flower making line, but they also have a more well balanced product line that will attract a wider base of followers for YouTube and will allow me to stay engaged and creative doing different things all the time. This appealed to me as I know a lot of people do not want to always make large 3D cards that are difficult to mail but would rather make classy cards or even quick and easy cards that are affordable to mail. So I felt like I was getting an opportunity to spread my wings, so to speak, and reach even more people with my card making journey. 

So for any of you who may be reading this, I want you to know that I have just formed a Facebook Group for ALL OF THE ABOVE! It is called Heartfelt Card Making With Spellbinders and More and I would love for all of you to join me over on facebook as we move forward living life together one card at a time. I encourage all of you to continue using your Heartfelt Creations products and mix them with other products from your stash and design to your hearts content. This is a community where all is welcome. Love, Melanie


Directions:

Cut a piece of white card stock measuring 7 3/8 x 10 3/4” and score at 5 3/8” for a side folding card base. Cut a piece a red mirror card stock to 7 3/8 x 5 3/8” and adhere to the front of the card base. Now from the HCDP1-2153 Holiday Ornament Paper Collection cut a piece measuring 5 1/4 x 7 1/4” from sheet 10B (dark green) and glue it to the card front. Now take the HCD2-7426 Oval Filigree Frame Die and using the largest die cut 2x, once from Luxe Gold Card Stock and once from white card stock. Adhere these together so that the white is slightly offset on top of the gold and the gold peaks out behind the white. Now cut the large oval die from the same die set, cutting it 2x from sheet 7B from the same paper pack. Attach the frame and one green oval to the front of the card and the other green oval to the inside of the card.

Using HCPC-31029 Large Holiday Ornament Cling Stamp Set Stamp put the large ornament with gold metallic ink onto white card stock and heat emboss with gold embossing powder. Do this once more but only stamping the center star. Using Copic markers carefully color the top and bottom of the ornament using reds and greens. Now using the coordinating dies cut out the large ornament with both the outer and the inlay piece. Also cut the individual star that was stamped and embossed. Using just the large outer die, cut 4x, once from Red Mirror Card Stock, and 3x from 110lb heavy weight card stock. (Deluxe Flower Shaping Paper was used in sample). Adhere all the ornament layers together with colored ornament layer on top followed by Mirror card and 3 white layers. Color the edges of card stock with matching red Copic marker. Glue the chipboard like Large Ornament to the card front and place the gold star in the center. Add gold gems to the Large Ornament and in the center of top star.  

Stamp a sentiment from the HCPC-31028 Christmas Holly Accents Cling Stamp Set with Red Geranium Archival Ink and die cut with the coordinating ink. Attach to the inside of the card to complete your project.

I hope you enjoyed that as much as I enjoyed creating it for each of you! Check out my personal project in the Heartfelt Creations Gallery to find out what products I used for this project.

Also, please be sure to visit the Heartfelt Creations Blog to see all of the gorgeous projects created by the other amazing design team members.

Wednesday, July 5, 2023

Fancy Butterfly Blooms

Hi Friends,

Today I have the beautiful Large Floral Butterfly back in action in this card. This is my all time favorite collection and the one which helped me reach the dream of getting onto the Design Team.   I hope you all enjoy this card created with love for all of you.


Instructions:

Cut a piece of white card stock measuring 5 1/2 x 8 and score at 7” creating a 1” flap at the top of the card base. Using the largest die from the HCD2-7384 Fancy Classic Rectangle Frame Dies cut through both layers with the top portion of the die hanging over the top fold of the flap. Cut a second piece of white card stock with the same die and adhere it to the back of the hinge creating the back of the top folded shaped card base. Using the same die, cut 2 more pieces, One from sheet 6A and another from piece 11B From the HCDP1-2138 Decorative Dragonfly Paper Collection. Adhere sheet 6A to the front of the card and 11B to the inside of the card. (NOTE: by adding the piece inside the card this will cover the seam where the card base was pieced together making the inside of the card finished. A small piece may need to be trimmed from the top to make it fit perfectly). Next using the second largest die from the same die set cut 2x, once from white card stock and once from Luxe Silver Card Stock. Layer the white on top of the silver and glue together slightly offset so that the silver peeks out from behind the white. Adhere this to the card front. 

Stamp the HCPC-3951 Large Floral Butterfly Cling Stamp Set onto white card stock using Versacolor White Embossing ink. Heat emboss with white embossing powder. Using two soft dye based ink colors with blender brushes lightly blend the colors over the heat embossing on the left wing to create a soft blended look. Using the HCD2-7352 Large Butterfly Die set, die cut the butterfly out and fussy cut around the body so that only the body and the left wing remains. Stamp a second body for the butterfly in the same manner and fussy cut the body out. Using Vellum die cut the decorative die from the butterfly set and lightly ink that as well before gluing the body to the body of the butterfly. Cover the glued vellum area with the fussy cut butterfly body. Small glue dots can tack the vellum down to the background and be covered by gems on the butterfly wings if desired. Glue to butterfly to the card front. 

Using the HCFB1-5005 Magnolia Cling Stamp Set, stamp out the medium bloom image two times using French Ultramarine Archival Ink. Also stamp out 5 leaves with Leaf Green Archival Ink. Before die cutting, color using the HCDA1-449 Stack and Store Daubers. Color the centers of the flowers using Viridian Archival Ink and the outer edges with the French Ultramarine ink. Color the leaves with Leaf Green. Die cut with the coordinating dies. Deepen the edges of the flowers with the French Ultramarine ink and the leaves with Leaf Green, before running them in the coordinating 3D Mold. Using the HCST1-401 Deluxe Flower Shaping Kit press the centers of each flower and pierce a hole in the center of each before adding the HCS1-457-1 Pastel Pearl Stamens - Small in Green to the centers. Finish both with a dusting of Nida Tanner’s Magic Glitter Powder by adhering it with Dries Clear Glue and a Hydra Sponge.

For background flowers and leaves stamp the floral stamp from the HCPC-3985 Dragonfly Florals Cling Stamp Set using Olive Archival Ink. Using English Ivy Archival ink stamp the leaves from the HCPC-3912 Cascading Wisteria Cling Stamp Set. Color the flowers in using Zig Clean Color Real Brush Markers and the leaves with Leaf Green ink. Die cut with coordinating dies. Ink the edges of the leaves with English Ivy ink.

Now arrange the flowers and leaves in the bottom right hand corner to complete the card. 


I hope you enjoyed that as much as I enjoyed creating it for each of you! Check out my personal project in the Heartfelt Creations Gallery to find out what products I used for this project.

Also, please be sure to visit the Heartfelt Creations Blog to see all of the gorgeous projects created by the other amazing design team members.

Wednesday, June 28, 2023

Shaker Window Christmas Scene With Poinsettias

 Hi Friends,

Today I have a really special card that I created with the amazing Festive Christmas collection. This collection has been a joy to create with, I really hope you have been able to add it to your collection. Lets take a look...


Instructions:

Cut a piece of white card stock measuring 8 1/2 x 6” and score at 4 1/4” to create a side folding card base.  Using the largest die from the HCPC-31016 Ornate Window Die set to cut through both layers of the card base making sure that the left side of the die hangs over the left side some to preserve some of the fold line. This will form a shaped card base. Now cut a piece of white card stock with the same die and glue straight on top of the card base to give that fold line side a finished look. Using this same die cut once from Sheet 11A from the HCDP1-2152 Festive Christmas Paper Collection (reserve this one for the inside). From the HCDP1-2130 Home for the Holidays Paper Collection using the inside window die cut a scene from sheet 1B for inside the window. Using this shape and size as a guideline also cut a piece of clear acetate slightly larger than this piece. Set both of these aside until the assembly process.

Stamp the HCPC-31016 Ornate Window Cling Stamp Set 3x onto red Card Stock with Versamark Ink after treating first with an anti static tool. Heat emboss using Gold Embossing Powder. Die cut just the top arch from one and the entire window from the other two using the coordinating dies. Attach one full window to the card front. Using a razor blade style knife and a cutting mat, cut the window opening down the center, across the bottom, and down from the top center till the first hinge along both sides. Score gently along the sides from hinge to hinge to open the window. Sit the window pieces aside.

Next stamp the Birdies on the Branch stamp from the HCPC-31027 Festive Berry & Birdies Cling Stamp Set 2x with Black archival ink onto white card stock. Color using the Stack and Store daubers using French Ultramarine and Poppy Inks for the birds and Emerald Green and Vivid Chartreuse for the leaves. For the finer details of the branches and tiny leaves use Zig Clean Color Real Brush Markers. Now with the same colors Stamp the leaf and berry branch out from the HCPC-31026 Christmas Lantern Cling Stamp Set and color in the same manner. Die cut with the coordinating dies. (Note: for one of the birdie branches trim off the birdies as just the branch will be used for foliage at the top of the window.)

Next stamp out 6 poinsettias from the HCPC-3881 Christmas Poinsettia and Holly Cling Stamp Set in Red Geranium Archival ink onto Deluxe Flower Shaping Paper. Color with the same. Die cut with the coordinating dies then using Stack and Store Daubers darken the edges of each petal. Glaze each flower using 3D Crystal Lacquer with a paint brush. Allow to dry. Then shape using the Deluxe Flower Shaping Mold and glue Gold Micro Beads to the centers.

Now to assemble the window shaker card; Taking the open window piece and carefully attach the two birdie pieces to the window glueing to the backside of the window. These will be on the outside of the acetate but made to look as they are outside the window in perspective. Turn the window face down and glue the acetate down to the back of the window attaching all the way around and also directly to the back of the birdie and branches you just attached. Give this a little time to dry. Now add two layers of 3D foam tape around the window opening making sure to seal in the opening completely so that the shaker bits do not fall out. Treat this inner well area with an anti static tool. Now add in the shaker bits (sequins and micro beads were added to this sample). Remove the foam tape backers and cover the well with the scene cut from the Home For the Holidays Paper Collections. Then Glue the entire front window to the back window to complete the shaker unit. 

To finish the front of the window add the embossed top detail using 3D foam dots. Then using a glue gun attach the leaf and berry sprig to the top left of the window along with 2 of the poinsettias. Lastly add the last poinsettia to the bottom right. For the inside of the card trim down the patterned paper previously cut so that it fits inside nicely, then simply cut an arched piece of white card stock using the Ornate Window die set to add to the inside for a written message.

I hope you enjoyed that as much as I enjoyed creating it for each of you! Check out my personal project in the Heartfelt Creations Gallery to find out what products I used for this project.

Also, please be sure to visit the Heartfelt Creations Blog to see all of the gorgeous projects created by the other amazing design team members.


Love, Melanie


Sunday, June 25, 2023

3D Embossing Folder Techniques Using the Mandala Blooms 3D Folder By Spellbinders

Hi Friends,

Today I come to you with a really fun embossing folder technique that I played around with using a new folder by Spellbinders.  I really liked the way it turned out. It is simple inking technique with really fun results. Experiment with the inks you own like I did and see what looks you come up with. Then try out different markers and just have FUN enjoying the process!!!! I have a full tutorial below but make sure to check out the close up photos as well. Enjoy!


Thank you for stopping by my blog today. For a full list of supplies please visit my YouTube Video or to Shop Spellbinders Directly Click Here. Thank you for supporting my work. 
 
Melanie
 
Disclaimer: I use affiliate links whenever possible. This means that links, when clicked on and shopped thru support me by allowing me to receive a small commission at absolutely no cost to you. Thank you for supporting me and my work.


Wednesday, June 21, 2023

Heartfelt Creations ~ Lantern Archway

Hi Friends,

I think the more I work with this collection the more I fall in love with it. It mixes so well with all of my other collections. I just love it. Today I am mixing it with a couple of different dies as well as an older poinsettia collection. Everything is mentioned below in my instructions. Now lets take a look.....


Instructions:

Cut a piece of white card stock measuring 10 x 7.5”  and score at 5” to create a side folding card base. Using the largest die from the HCD2-7337 Teardrop Lattice Gateway Die Set to cut through both layers of the card base making sure that the left side of the die hangs over the left side some to preserve some of the fold line. This will form a shaped card base. Now cut a piece of white card stock with the same die and glue straight on top of the card base to give that fold line side a finished look. Using this same die, cut once from Sheet 7B (dark blue) from the HCDP1-2152 Festive Christmas Paper Collection. Next using the largest die with the second largest die cut it 3x, twice from sheet 5B (light blue) and lastly from Luxe Silver Card Stock. (reserve one light blue piece for the inside of the card). Using Night Sky Archival Ink along with the Stack and Store Daubers ink the edges of the Light Blue pieces. Glue the light blue piece on top of the silver one, offsetting it as little so it peeks out from behind the blue for a drop shadow effect. Glue this double layer to the card front. Using the third largest die from the HCD2-7426 Elegant Filigree Frame Die Set cut 2x, once from white card stock and once from Luxe Silver Card Stock. Layer these so that the silver is slightly offset behind the white like in the previous step. Attach this double layer to the card base using foam tape for added dimension. 

Stamp the Lantern image 2x from the HCPC-31026 Christmas Lantern Cling Stamp Set onto Copic X Press It paper using Memento Tuxedo Black Ink. Also stamp the Holly Berry Stamp from 2x from the HCPC-31028 Christmas Holly Accents Cling Stamp Set and color all of these images with Copic Markers. (TIP: One lantern image is colored entirely, the other image on the area that gets die cut by the inner lantern die that will layer on top). Stamp one tree branch with birdies in Archival Black onto white card stock from the HCPC-31027 Festive Berry & Birdies Cling Stamp Set. Only color the birds using stack and store daubers along with French Ultramarine and Poppy Archival inks, then use just the bird dies when die cutting. Stamp out the sentiment from the Christmas Lantern Stamp Set using Night Sky ink onto white card stock. Lastly stamp out 6 poinsettias from the HCPC-3881 Christmas Poinsettia and Holly Cling Stamp Set in Vermillion Archival ink onto Deluxe Flower Shaping Paper. Color with the same. Now die cut all images using their coordinating dies. For the sentiment die cut an extra die from Luxe Silver Card Stock to add as a drop shadow. 

To complete the flowers shape using the coordinating Flower Shaping Mold and glue multicolor yellow pearls to the centers. Add Nida Tanner’s Magic Glitter Powder for a sparkling finish. 

Arrange the Lantern and flowers on the front of the card in a pleasing way. Attach the second focal lantern to the center of the image using 3D foam dots. Add the birdies with foam dots. Glue down the leaves and berry branches and lastly hot glue the poinsettias into place. Off set the sentiment for a finishing touch. For the inside simply trim down the light blue layer set aside earlier, and cut a white layer from a smaller die from the same Teardrop Lattice Gateway Die Set for a place to leave a personal message.

I hope you enjoyed that as much as I enjoyed creating it for each of you! Check out my personal project in the Heartfelt Creations Gallery to find out what products I used for this project.

Also, please be sure to visit the Heartfelt Creations Blog to see all of the gorgeous projects created by the other amazing design team members.


Love, Melanie